High-resolution video calls
Because Sourcegraph is all-remote, I do a lot of video calls from my home office. Over time, I’ve improved the lighting and video quality of my video calling setup. Here’s how I did it.
Here’s the difference in quality. (It’s especially noticeable if you enlarge the photos.)
Before

After

Equipment list
In all, this will cost around $2,000 USD. If you’re looking for something cheaper, just get some of the lighting for around $120-320 USD (lighting makes a huge difference).
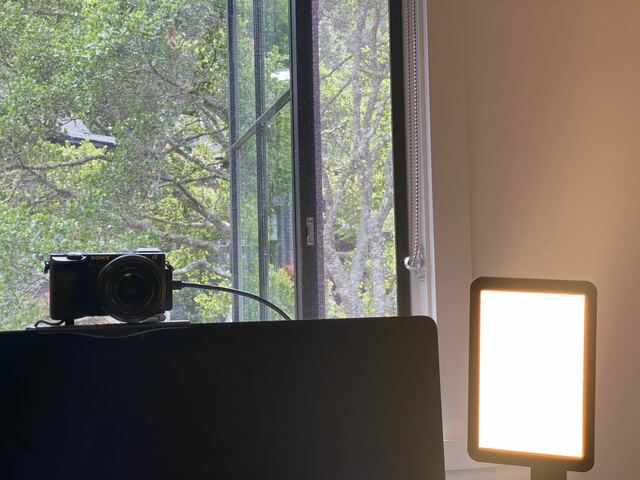
- Sony Alpha A6600 Mirrorless Camera
- Other cameras will probably work, as long as they have HDMI output.
- On the Sony cameras, you’ll want to disable the info display on the HDMI output (which is configurable in the camera’s on-device settings menu) so that your video feed doesn’t have all the icon and status overlays.
- Sony SEL28F20 FE 28mm f/2-22 Lens
- Elgato Cam Link 4K, for making the camera’s HDMI output appear as a webcam to your computer.
- If this is out of stock, try:
- HonetTek HDMI Video Capture Device (I’ve used this one)
- Any other “video capture” device that goes from HDMI to USB, ideally supporting 4K but 1080p is fine.
- If this is out of stock, try:
- Micro HDMI to HDMI cable, for connecting your camera to the HDMI video capture device.
- Gonine NP-FZ100 AC Power Adapter Kit, basically a fake battery that plugs into an AC outlet (so you don’t need to worry about draining the battery).
- LED floor lamp
- LED desk lamp
- Elgato Ring Light
- This ring light has a camera mount. If you don’t want to get the ring light, get the YOKEPO Computer Shelf, which works to rest your camera on top of your computer so the camera angle is natural.
- Audio: I just use AirPods. They work well enough for me.
- Matt Mullenweg investigated a bunch of headsets to find the best.
- Garry Tan recommends some better audio equipment.
Here’s what I look at when I’m on a video call. The camera rests on the shelf on my iMac, right above the iMac’s built-in webcam.

How I got to my current setup
Step 1: built-in camera with warm room lighting
I started out using my iMac’s built-in FaceTime HD Camera and an LED floor lamp (in addition to my home office’s ceiling lighting) set to the “warm” color temperature.

Step 2: warm spotlight
Next, I got an LED desk lamp (with a warm color temperature) to illuminate me in front of the camera. The result was much better, especially at night.
The spotlight takes a little while to get used to because it’s fairly bright. I find that it’s actually quite nice to have bright, direct light in the mornings, especially in the winter when the sun isn’t out yet.

However, the image is still quite blurry and grainy compared to a photo or video taken on a modern iPhone. I can do better than that! Also, the walls, door, and desk behind me take up most of the frame. I could use a virtual background, but I didn’t want to. If I zoomed in more, the image would become even blurrier.
Step 3: real camera
I lived with the setup above for several months. I looked around for better webcams, but nothing seemed significantly better than my iMac’s built-in webcam.
Then I had a Zoom video call with Kevin Mahaffey, who had already figured this all out and had amazing video quality. Credit goes to him for helping me with the rest of this setup. The equipment list has the mirrorless camera and other gear needed for this.
One additional benefit is that your background is optically blurred (because of the lens), which looks great and adds privacy.

Related reading
- The rest of my workstation setup
- Videoconferencing hardware with low latency video from Avery Pennarun of Tailscale
- Andreas Klinger’s compilation of high-res video setups
- How to Zoom like a CEO
- Garry Tan’s telework setup, with very similar recommendations
- Are computers getting faster? specifically on input latency